I’ll admit that I had never had any knowledge from this IPTV Smarters Pro Player until I was able to stumble across it and I thought I’d give it a try to see what it’s about.
I must say that I’m pretty amazed. IPTV Smarters Pro offers an entirely different approach from many other IPTV players in terms of design in terms of user interface. There’s also a neat small feature I found very refreshing.
IPTV Smarters Pro IPTV
IPTV Smarters Pro is a full-featured IPTV player that is available across Android, iOS, and Smart TV platforms, specifically LG & Samsung, available to download from the respective TV apps stores. It’s also approved to be compatible with PC, i.e., Windows 8/10 and macOS. As far as I know there is currently no Linux support available right currently.
Find out how to setup IPTV using IPTV Smarters Pro.
What do you require to complete this tutorial
In order to complete this tutorial, you’ll require these items:
- Any Android, Windows, iOS, macOS platform.
- IPTV service provider You are free to choose any provider of your choice.
- A connection to the internet.
Features
IPTV Smarters Pro boasts a impressively extensive feature list. I’m still struggling to accept the fact that I’d never had any idea about it prior to.
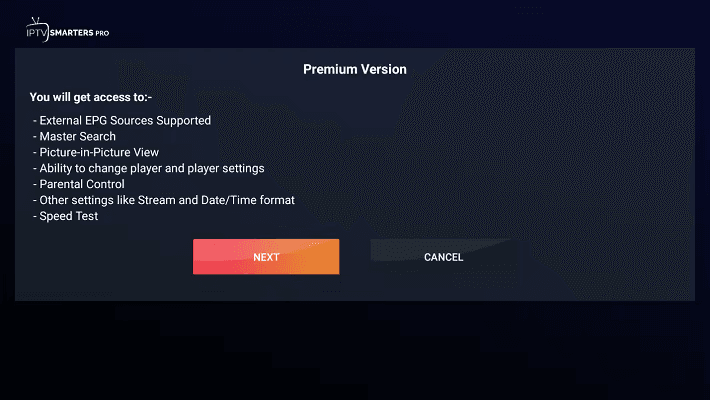
It is important to be aware that a few options are available only in the premium version. For instance:
- Automatic detection of platforms (you’ll be able to see this in the video tutorial)
- Multi-screen simultaneous viewing
- Local content plays
- Buffer size modification
How to Configure IPTV to IPTV Smarters Pro
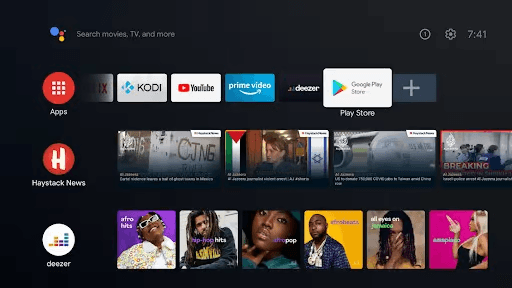
Step 1. On your screen at home, enter the Play Store.
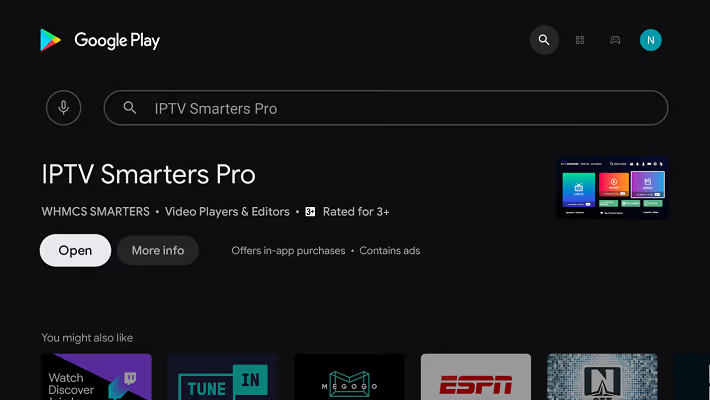
Step 2. Find “IPTV Smarters Pro”.

Third step: click”Install” “Install” step 3. Click on the “Install” button.
Step 4: After the installation is complete After that, select “Open” to start the application.
Step 5: Once the application will recognize the platform you’re running it on, then save:
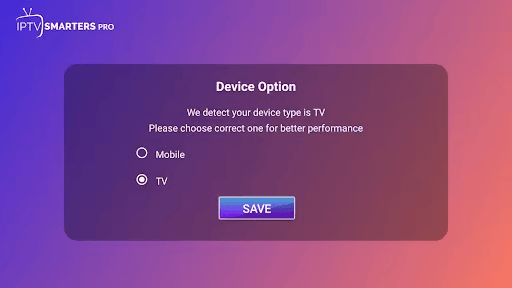
In my experience it was it was the Android TV platform from the Nvidia Shield was detected as “TV.”
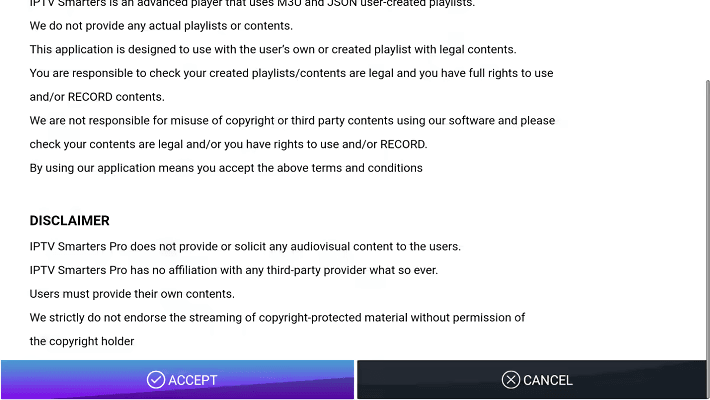
Step 6: Agree to these terms and conditions that are presented to you.
Configuring IPTV on IPTV Smarters Pro
1. Click the “Load Your Playlist or File/URL” button to continue.

Step 2. Step 2: Click “Allow” to let IPTV Smarters Pro to access the files stored that are stored on the device.
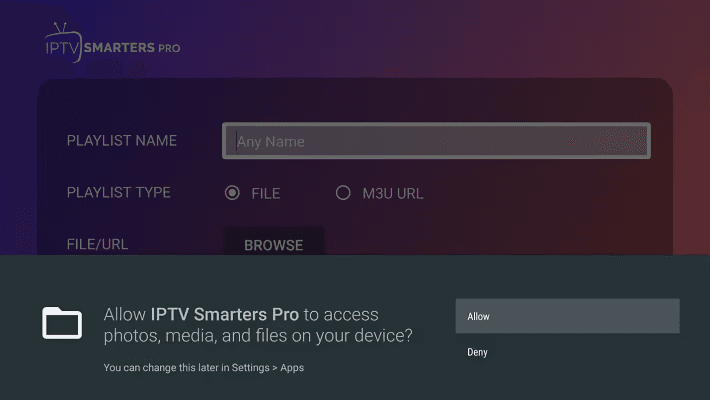
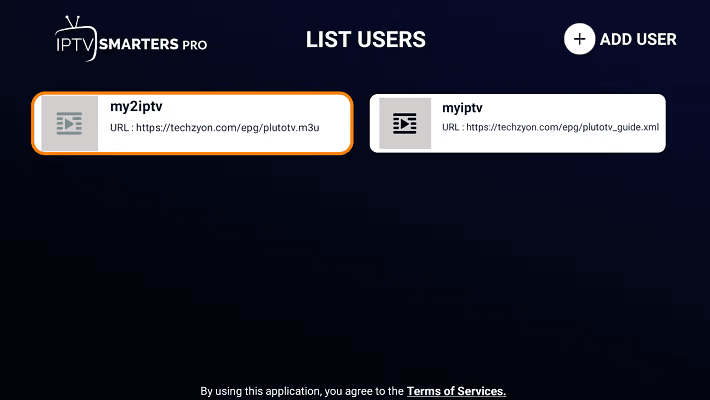
3. Fill out the application form, and then click “Add Users”.

The name of the playlist should be one you can easily refer to when you are using many IPTV services. The type of the playlist must be M3U and the File/URL must be the M3U link supplied from your IPTV provider. It’s important to know that the app identifies various IPTV service providers under the name “Users,” so don’t get confused.
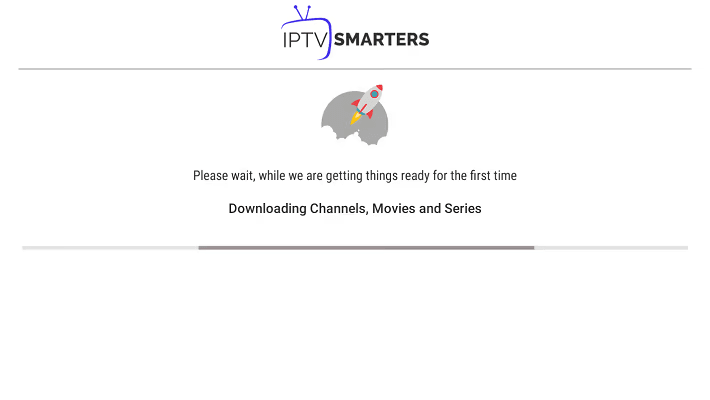
Step 4: You will notice the screen below informing you that M3U content is loading.
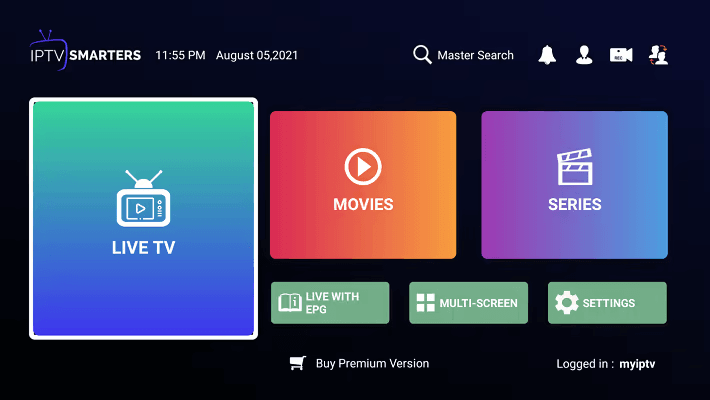
Step 5: You’ll be shown the following screen. After the loading has been completed Click on “Live TV”:
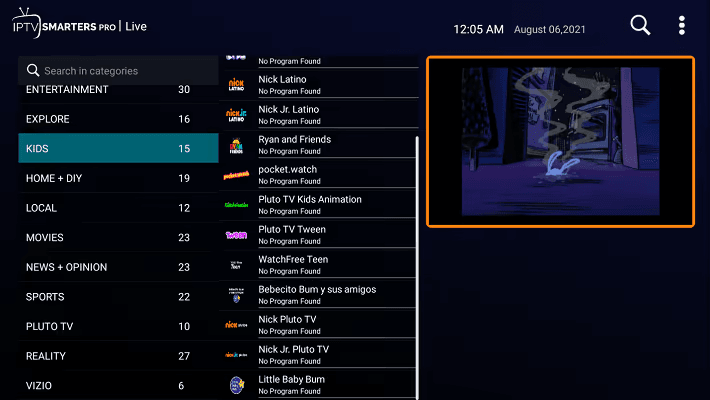
Step 6: You’ll see the following screen that displays the IPTV channels to the left, and the channels from every category in the middle and the PIP (Picture In Picture) display to the right.

7. Click a channel you like. It is important to note that the channel starts playing in a small window, which allows users to view the content prior to playing it on the full screen. Click on the screen.
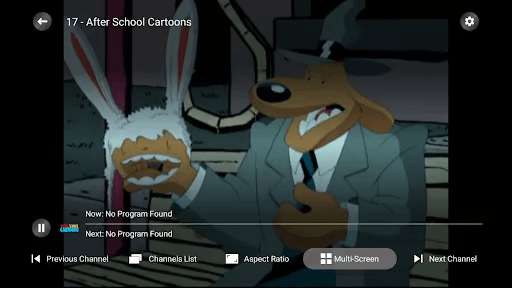
Step 8. You are now able to take pleasure in watching on a full screen. Click the “Multi-Screen” button at the end of the screen.
Step 9: Select the multi-screen layout that you would prefer to use.
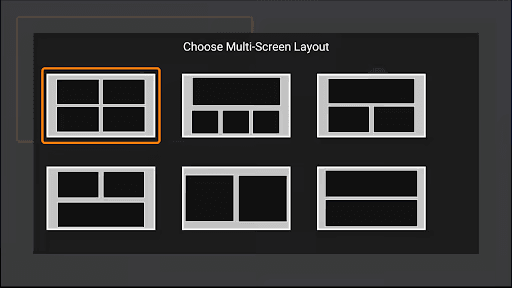
10. You are able to now stream several channels on multiple screens simultaneously.

I have to admit, I was amazed by this. I’m the only time that I have met a player who is able to do that, which is amazing!
Additional Functions:
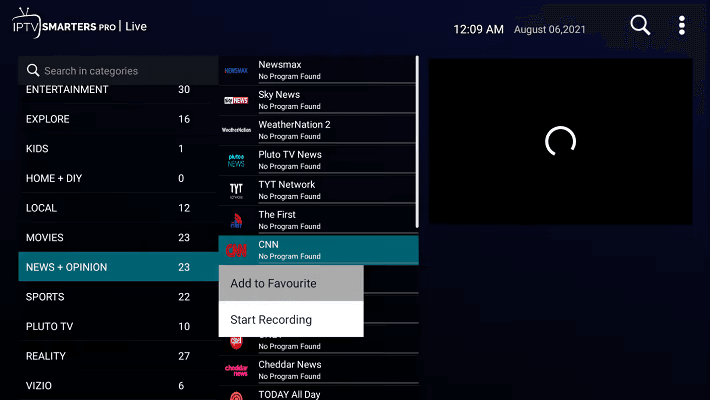
Step 1: In the list of channels you can select any of the channels to add it to your favorites or start recording. make sure the player is able to record live TV.
Second step: clicking the menu at the top right offers the menu below that lets you sort categories and channels or refresh M3 U content in case you require it.
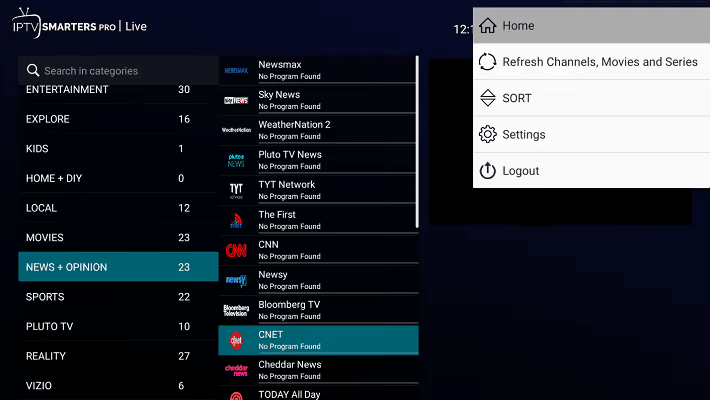
Step 3. Step 3: The “Settings” Menu item prompts users for an upgrade in order to gain access to additional features.
4. You are able to toggle to “users,” ie, IPTV services, making the player extremely useful for managing multiple IPTV services in the event that you need to.
Conclusion
It’s relatively simple to set up IPTV using IPTV Smarters Pro. However, much of the features are restricted to the premium paid version. Overall I would highly suggest the player, especially because of the multi-screen capabilities.
But, if you’re from an open-source program like Kodi or Kodi, you might be able to find the entire “Premium Version” thing a bit tedious.
As always, I’m looking forward to hearing your ideas and suggestions by leaving a comment below. Please let me know what that I can improve upon or send me a message for me to say that you liked the video.